

Once you login, you will be able to create as many projects as your Tier allows. With free tier, you can create up to 2 projects.
Create a Project
To create a new project click on the Create Project button and provide a Project Name along with a Description.

Project Tile
If you have multiple projects, assigning colors to tiles can come in handy. Select a Color for your project.

Click Next.
Connect a Domain
You may connect your project to a domain now, or skip this part for later. It is a good idea to reserve the domain as early as you can. Domains are exclusive for every project and user... and allotted on a first come, first serve basis. To reserve a domain, provide the Site name and click on the Connect button.
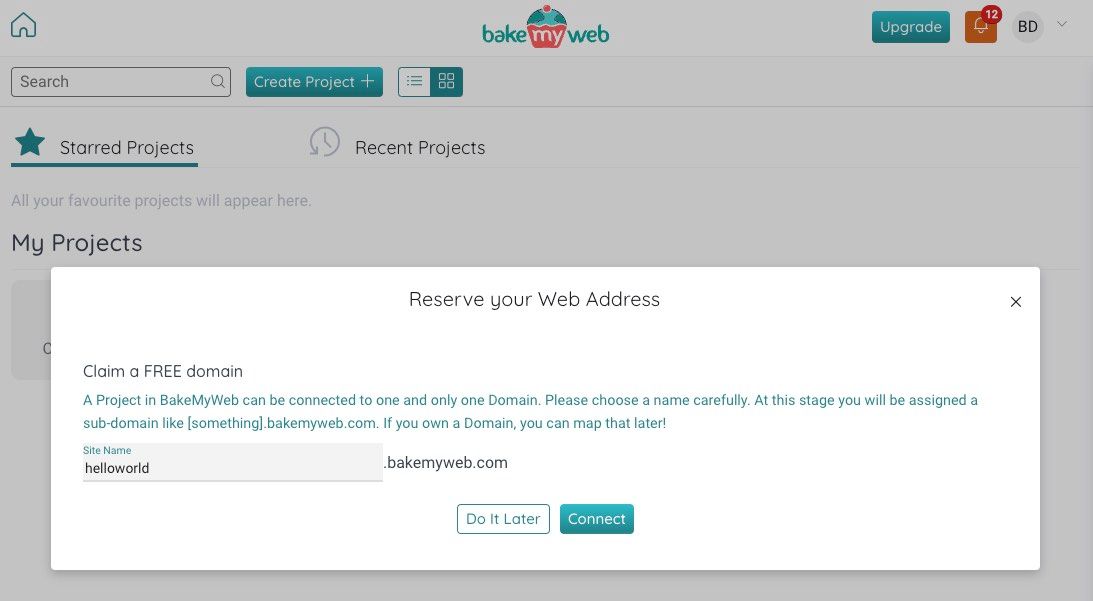
Soon enough, your project will be created with a domain name. If the domain name is already reserved, you may choose to connect it later. Keep trying until you find a domain name you are happy with.
Project Successfully Created, what next?
After the project is created, you will be taken to the Project page automatically which looks like this:

In the left pane, you will see different Controls of All Pages along with various kinds of pages (which you will learn about in a bit). On the right pane is your editor along with the Page related controls for the selected page. Each page is a separate entity and you should make it a practice to save your progress periodically while editing. Before you learn about the page editing, let's take a moment to explore the various navigation options and working with multiple projects.
Update Project details
To update a project detail, navigate to the project and expand the box called Project Details. Here you can either Edit the project details, or Delete the project.
I have read this


